15 steps to a complete veterinary dental exam and treatment procedure
Are you ready to shine in dentistry? Follow these steps for a polished performance.


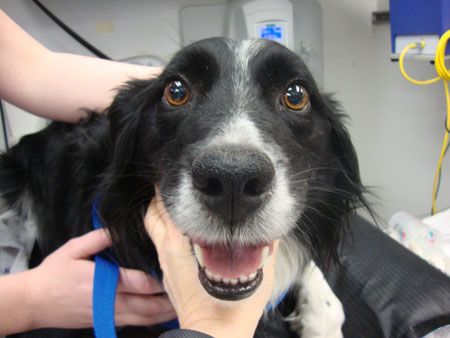
Benita Altier during a dental procedure. (All photos courtesy of Benita Altier)Though we commonly think of “a dental” as any sort of dental care that is performed under general anesthesia, this oversimplifies what is (or should be) occurring when we undertake professional dentistry for animals.
The complete veterinary oral health exam and dental treatment consists of 15 vital steps:
1. Perform basic oral/facial/skull exam on conscious patient
Evaluate occlusion as well as all soft and hard oral and facial tissues as thoroughly as possible to create a treatment plan for the client before anesthesia. This is just the initial look around and is only allowing for minimal assessment of the condition of the patient's oral cavity. General anesthesia is required for a complete oral evaluation, including full mouth dental radiographs.


A "before" photo of a canine patient.2. Take “before” photographs
Use a digital camera to take “before” photos of the oral cavity-including the dentition and soft tissues of interest-so you can offer the client a visual comparison.


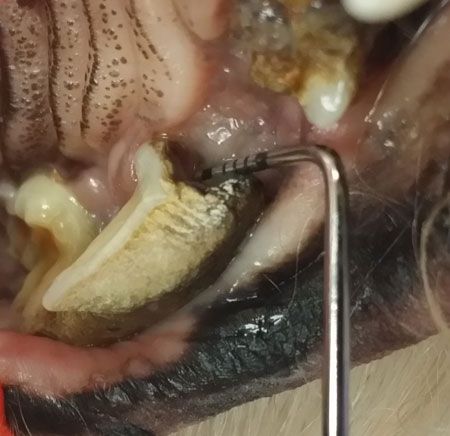
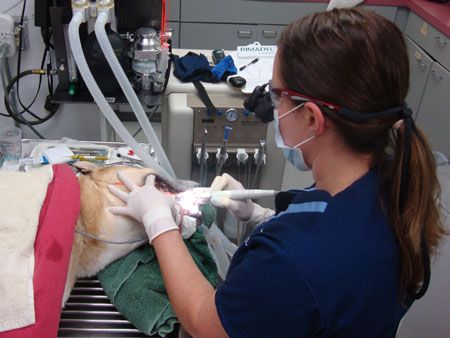
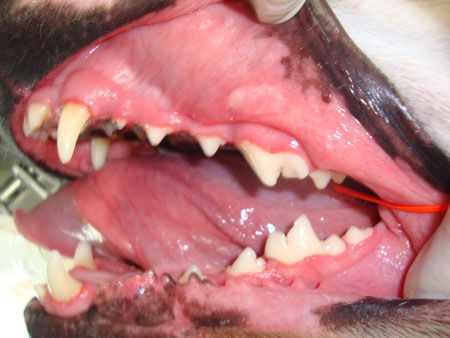
Altier probes a furcational defect in the left maxillary fourth premolar in a canine patient.3. Perform oral exam and initial gross decontamination procedure on anesthetized patient
This is a more thorough evaluation of the oral and facial structures, including a complete occlusal evaluation. (Tip: Evaluate occlusion before placing the endotracheal tube.) Rinse the patient's mouth with a 0.12% chlorhexidine oral rinse before the exam. Gross calculus should also be removed to allow access to soft tissues. This step decontaminates the oral cavity; however, it's not the end product as far as the cleaning procedure is concerned.
4. Thoroughly chart and document all oral structures
Using an explorer/probe, attempt to locate any areas of concern or pathology, such as missing teeth, fractured teeth, periodontal pockets, mobile teeth and extra teeth. A complete chart that documents the mouth pre- and post-treatment with multidirectional views of each tooth will help the veterinarian create a plan for further diagnostics and treatment as well as accurate documentation. A dental mirror can also enhance your ability to visualize areas of concern, and proper lighting and magnification can increase your recognition of oral structure abnormalities.


A radiograph of the mandibular first molar in canine patient. Dens invaginatus, a tooth formation abnormality, is present in the 309 tooth. 5. Obtain a series of full mouth dental radiographs
This step should be completed as early in the procedure as possible to determine whether disease is present within the bone that surrounds the teeth and within the teeth themselves. Without full mouth dental radiographs every time, we can neglect to recognize periodontal disease and other dental diseases fully and can thus undertreat patients suffering from oral pain and inflammation.
6. Create treatment plan
Each and every tooth needs a plan. If the plan is to simply perform only prophylactic procedures (such as supragingival and subgingival cleaning and polishing) that is wonderful because we have ruled out more serious disease that requires treatment. However, more often than not, our patients require oral surgical procedures for extractions or periodontal treatment to save teeth.

A canine patient right before anesthesia.If the patient requires only prophylactic procedures, you can skip steps 7 through 10 and go straight to step 11.
7. Perform regional anesthetic blocks on patients requiring painful treatments
Allow at least 10 minutes for these blocks to take effect before more painful stimulus is caused by extractions or subgingival cleaning and root planing.
8. Perform advanced periodontal therapy, exodontics, endodontics or other procedures
Prioritize these as directed by the veterinarian. These procedures require a team effort involving the veterinarian and technicians as well as the anesthetist who is carefully monitoring the patient during the procedures.
9. Obtain post-extraction radiographs
As indicated by changes to tooth or bone structure, these radiographs should be obtained before suturing the extraction sites to avoid the need to undo sutures to retrieve root or tooth structure that was inadvertently left behind during the extraction.
10. Re-evaluate occlusion as needed after extractions
This can be an important step if teeth were extracted to ensure there are no complications from the patient's jaws closing more fully or if the veterinarian extracted teeth to alleviate any current malocclusion issues.
11. Final supragingival and subgingival cleaning procedure
While most of the major cleaning occurs in step three, this step is the fulfillment of the cleaning procedure before finishing treatment and recovering the patient. Combine hand instrumentation and power instrumentation for the best outcome. Use an ultrasonic scaler to do most of the major work and then hand scalers and curettes if you need to get more detailed. Subgingival calculus must also be removed if there are periodontal pockets below the gingival margin. Use the rounded back and toe of a curette to reduce the likelihood of damaging the attachments at the bottom of the sulcus. This step concludes with periodontal bactericidal ultrasonic debridement using a periondontally-approved tip for your ultrasonic scaler to further lavage away all debris and reduce the bacterial concentration below the gingival margin and in shallow periodontal pockets.
12. Polish tooth crowns
Polishing helps create a smooth, non-plaque-retentive surface so teeth remain free of plaque. It can also remove any plaque that was missed during scaling and curettage as well as remove stains from the enamel. Attach a prophy cup to the working end of a disposable prophy angle on a low-speed handpiece. Polish all coronal surfaces in a systematic fashion, starting at the most caudal teeth and working toward the midline or central incisor in each quadrant. The polisher should spin at about 2000 to 4000 rpm. (Note that it is capable of spinning at 20,000 rpm.) This will avoid splattering the polish and creating too much friction on the tooth's surface.
13. Irrigate teeth and sulcus
The gingival sulcus is a prime place for leftover debris (like calculus, cellular debris, prophy paste and plaque) to accumulate after a thorough dental cleaning or after periodontal therapy has been performed. And if this debris is left, it will act as an irritant and possible source of periodontal disease in the future. Gently lavage the debris out of the sulcus using either a three-way syringe on your dental machine (which uses air and water) or a syringe filled with sterile water or 0.12% chlorhexidine gluconate oral solution with a 22- to 28-gauge blunt tip needle or cannula.

An "after" photo of a canine patient.14. Take “after” treatment photographs
These digital images, along with images of the dental radiographs (if applicable), can be shared with the client along with pre-treatment photos to illustrate the difference. These photos and radiographs can also help you follow visual changes in the patient's dental health over time.
15. Apply fluoride or sealants, if indicated
Cavity caveat
Note that cavities are rare in dogs and extremely rare in cats, so they may not be a viable reason to apply fluoride.
Applying fluoride foam is controversial, due to possible toxicity if used in chronically higher-than-recommended doses and because it can interfere with certain restorative, bonding and sealing agents. But it may have some benefits, such as decreased tooth sensitivity-especially if dentin is exposed on the coronal or root surfaces-because it seals exposed dentinal tubules. It also inhibits bacterial metabolism and can help the enamel resist decay. If applied to cleaned, polished, lavaged and dried tooth surfaces, it should be allowed to remain in contact with the enamel or dentin for three to five minutes. After that, it should be carefully wiped off with dry gauze. (Note: Avoid rinsing as it inactivates the fluoride.)
Oravet Plaque Prevention Gel can be used on both cats and dogs to prevent dental plaque adherence to the enamel surfaces of the tooth crowns. It should be applied up under the gingival margin on the surfaces of the crown and in the sulcus to prevent plaque from accumulating under the gum line.
Sanos Veterinary Dental Sealant provides a liquid barrier for dogs and cats that stays in place for up to six months after being applied to the gingival sulcus. It has a Veterinary Oral Health Council label for the prevention of plaque and tartar accumulation, and it may reduce gingival inflammation that can be caused by the plaque bacteria invading under the gingival margin. It should be applied to clean, dry teeth and gingival sulcular surfaces. (Note: If the veterinarian plans to use Sanos, fluoride application is not recommended.)
Benita Altier, LVT, VTS (dentistry), began her business, Pawsitive Dental Education, with the goal of bringing professional dental instruction to veterinary hospitals and conferences across the United States and Canada. She is also a CVC educator and currently resides in Washington.